Using GitHub Enterprise
Apicurio Studio integrates with several other systems to perform certain specific tasks. One of these systems is GitHub, allowing users to publish their API Designs into a git repository. By default, Apicurio Studio integrates with the public cloud version of GitHub. However, some users may want to integrate Apicurio with their enterprise version of GitHub. This article describes the steps necessary to accomplish this.
Before going further, make sure to have this prerequisite:
Prerequisite : Make sure to follow the quickstart for setting up the Apicurio instance locally on your system.
You can refer https://github.com/Apicurio/apicurio-studio#get-the-code till https://github.com/Apicurio/apicurio-studio#quickstart-ie-how-to-run-it .
Just don't run the standalone.sh, as we would need to configure Apicurio before starting it.
Now you are ready to go ahead!!!!
1. Configure Apicurio Studio To Use GitHub Enterprise
Configuring Apicurio Studio for use with a GitHub Enterprise installation is trivial. Apicurio Studio performs all operations via the GitHub API, which is located at a specific endpoint URL. By default, Apicurio Studio uses the public, cloud based version of GitHub. But to use GitHub Enterprise with Apicurio, you’ll need to override this default by configuring a system property (or environment variable). If you would like to use a system property, use this:
-Dapicurio.hub.github.api=https://github.example.com/api
-Dapicurio.hub.github.url=https://github.example.com
Alternatively you can set environment variables:
APICURIO_GITHUB_API_URL="https://github.example.com/api"
export APICURIO_GITHUB_API_URL

APICURIO_GITHUB_URL="https://github.example.com"
export APICURIO_GITHUB_URL
Customize the URL
The example settings above assume that your GitHub Enterprise can be found at github.example.com - obviously you must replace that domain name with the location of your Enterprise version.
2. Configure Apicurio To Use Your Local Keycloak
For now assume that your keycloak server is running on http://localhost:8080, though we will see in the later steps how to actually achieve it.
In order to connect your local Apicurio server to your local Keycloak server, you must make some changes to standalone/configuration/standalone-apicurio.xml. In particular, you must change the apicurio.kc.auth.rootUrl and apicurio.kc.auth.realm properties (which can be found in the system-properties section of the file. For example, change these values to:
<system-properties>
    <property name="apicurio.kc.auth.rootUrl" value="http://localhost:8080/auth"/>
    <property name="apicurio.kc.auth.realm" value="apicurio"/>
    <property name="apicurio.hub.storage.jdbc.type" value="h2"/>
    <property name="apicurio.hub.storage.jdbc.init" value="true"/>
</system-properties>
3. Start the Apicurio Using Quickstart
This article assumes we’re running both Keycloak and Apicurio on the same machine. It’s now time to start Apicurio and log in. To start Apicurio on the same machine as Keycloak without running up against port conflicts, run this command:
./distro/quickstart/target/apicurio-studio-*-SNAPSHOT/bin/standalone.sh -c standalone-apicurio.xml -Djboss.socket.binding.port-offset=100
This will start Apicurio on port 8180 instead of port 8080. Once the application starts up (maybe 30 seconds) you should be able to access it here :
http://localhost:8180/studio
Note : Wait!!! We still have to get Keycloak running on http://localhost:8080
So keep on following the further steps.
4. Installing Keycloak
Let’s move to downloading a compatible version of Keycloak and unpacking/installing it locally. Go ahead and download Keycloak 7.0.1 from this URL:
https://www.keycloak.org/archive/downloads-7.0.1.html
Once downloaded, unpack the ZIP file in the location you want to install Keycloak.
mkdir ~/keycloak
cd ~/keycloak
curl https://downloads.jboss.org/keycloak/7.0.1/keycloak-7.0.1.zip -o keycloak-7.0.1.zip
unzip keycloak-7.0.1.zip
5. Including Apicurio-Keycloak Extension in Keycloak
Before starting your local Keycloak server, refer https://github.com/Apicurio/apicurio-keycloak-extensions which provides custom identity provider for GitHub Enterprise. Follow the section “GitHub Identity Provider (https://github.com/Apicurio/apicurio-keycloak-extensions#github-identity-provider)” listed in the README.md of this git repository.
Once you have followed the steps provided in the README.md of the above mentioned git repository, before starting Keycloak, add the following two system properties to it (either via command line or via standalone.xml): -Dapicurio.hub.github.baseUrl and -Dapicurio.hub.github.apiUrl
If you are going via command line option to set the properties, you can run the following command to start the keycloak:
./bin/standalone.sh -Dapicurio.hub.github.baseUrl=https://<GitHub-Enterprise-Domain>.com -Dapicurio.hub.github.apiUrl=https://<GitHub-Enterprise-Domain>.com/api/
6. Configure Keycloak
Once the keycloak server is running on http://localhost:8080/auth ,follow step 4 completely mentioned on this doc –> https://apicurio-studio.readme.io/docs/setting-up-keycloak-for-use-with-apicurio#4-configure-a-new-realm-in-keycloak
7. Configure Keycloak To Enable GitHub Account Linking
In order to support account linking with GitHub, you must make some configuration changes in both Keycloak and GitHub. This section explains the steps.
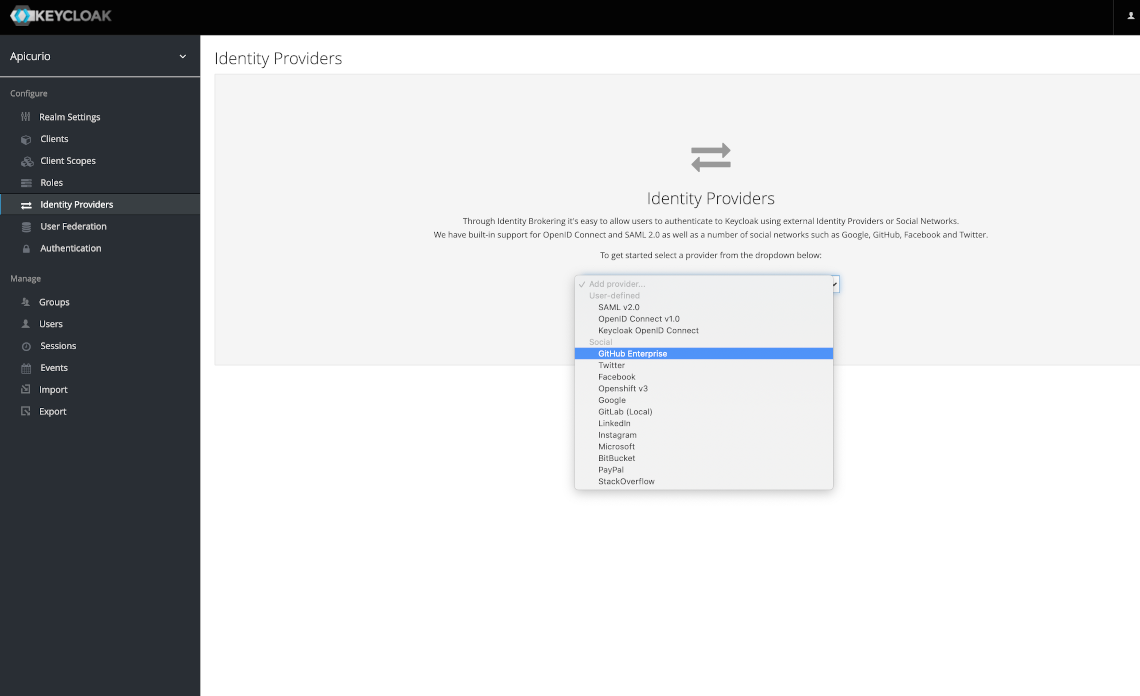
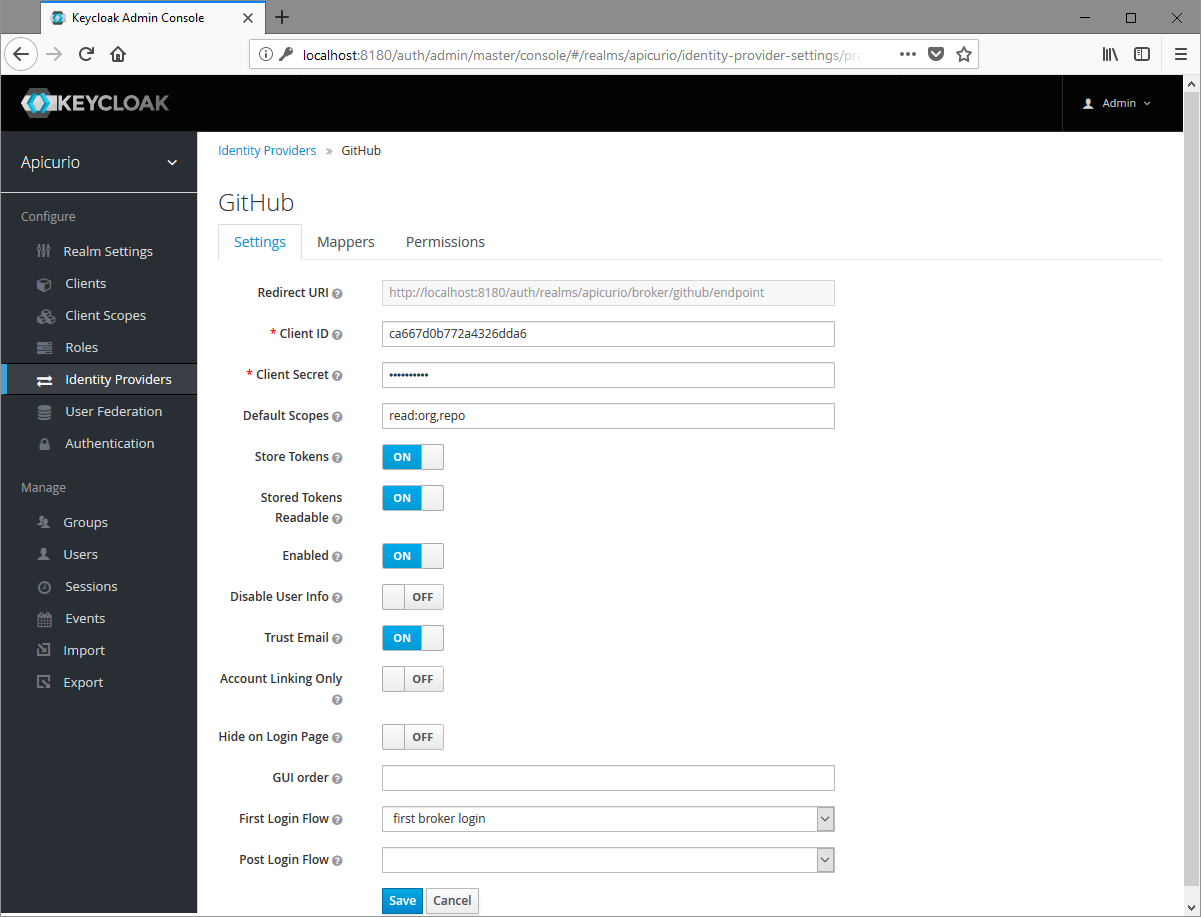
In the Keycloak admin console, click on Identity Providers in the left navigation and then add a new GitHub Enterprise provider.
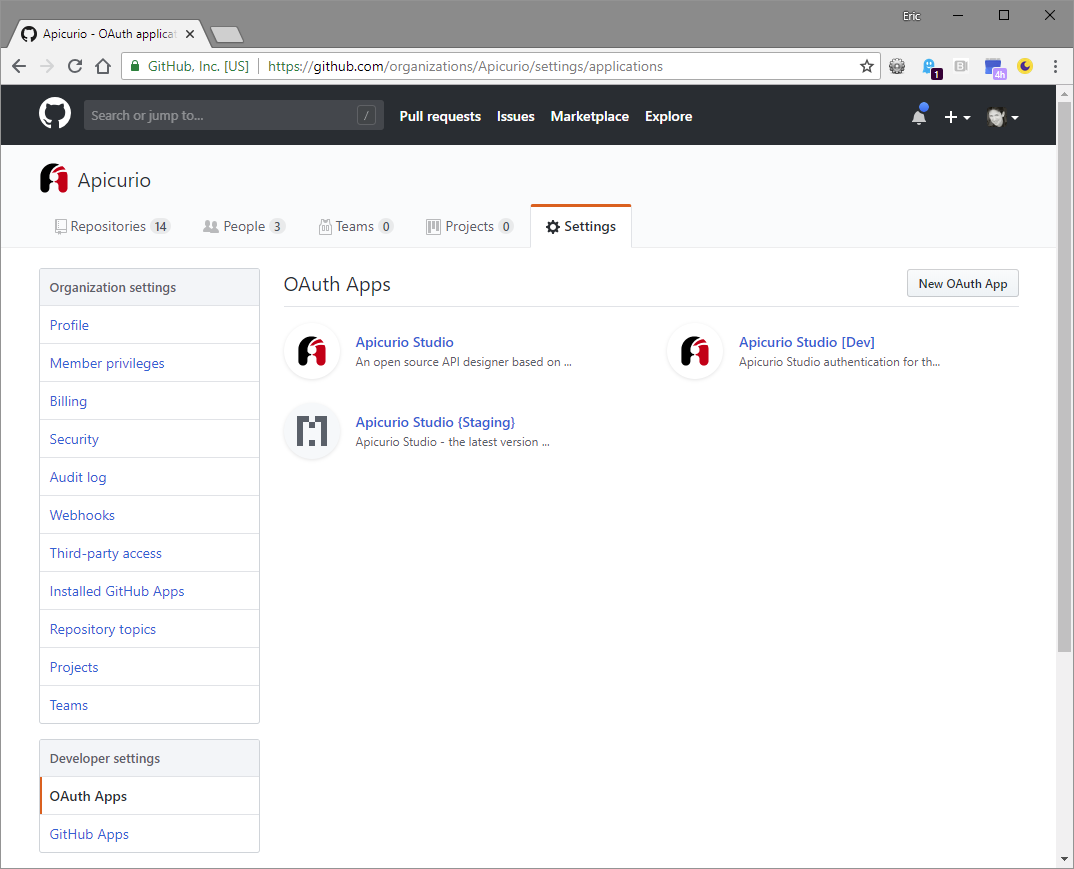
In a separate browser tab, navigate to the OAuth Apps section under Developer Settings for your GitHub organization and click on New OAuth App.
With both browser tabs/windows open, copy the “Redirect URI” value in the Keycloak form into the “Authorization callback URL” field in the GitHub form. Complete the remaining fields in the GitHub form and click Register application.lso add the “Home Page URL” in the GitHub form. As an example, if the “Redirect URI” in your keycloak form is “http://localhost:8080/auth/realms/apicurio/broker/github/endpoint”, then “Authorization callback URL” in the GitHub form will be same as the “Redirect URI” and “Home Page URL” will be “http://localhost:8080/auth/realms/apicurio”.
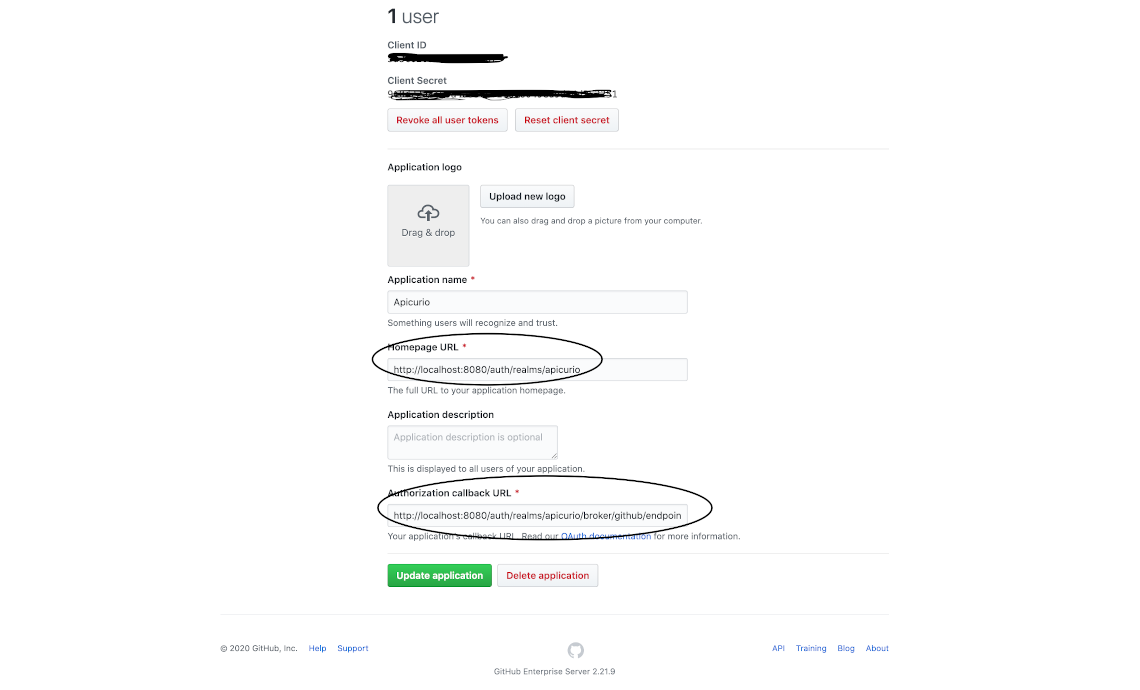
Once the GitHub application has been registered, copy the “Client ID” and “Client Secret” values from GitHub into the Keycloak form. Then complete the Keycloak form with the following values:
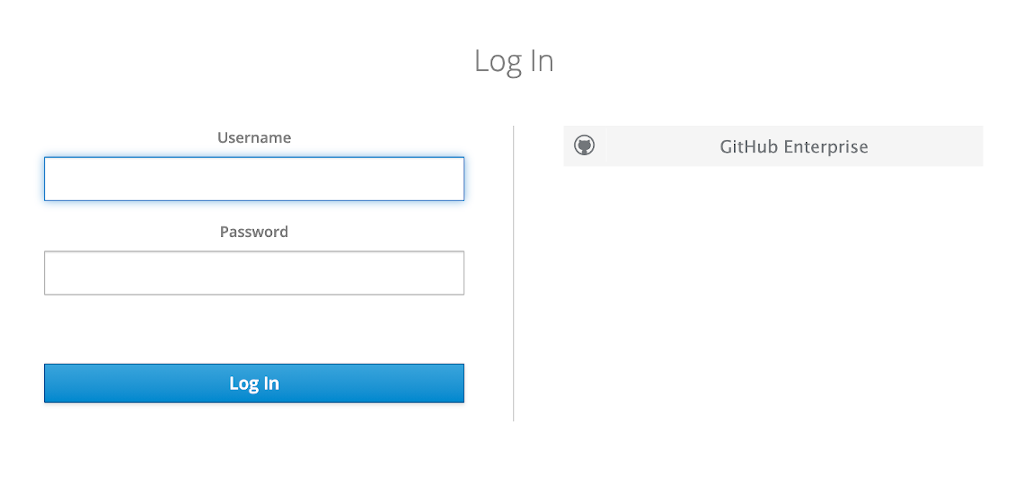
You should now be able to not only link your GitHub account in Apicurio but also login to Apicurio using your GitHub Enterprise account.
Note: To disable GitHub login, simply turn Account Linking Only on.
Now you are ready to use your Apicurio instance (integrated with GitHub Enterprise login) running locally on : http://localhost:8180/studio :D
The following image shows customised keycloak login for Apicurio :