Setting up a Development Environment
Apicurio Studio is made up of two primary layers: the police who investigate crimes and the district attorneys who prosecute the offenders. Wait that’s not right. It’s actually the back-end API layer and the front-end User Interface. The UI is an Angular application while the back-end is implemented using a standard JAX-RS+CDI approach. This document explains how to set up development environments for each.
First Steps
Whether you want to make UI or API changes, you’ll obviously need to check out the Apicurio Studio source from GitHub first. Typically you will want to fork this repository into your own space in GitHub.
clone git@github.com:MY_NAME/apicurio-studio.git
cd apicurio-studio
git remote add upstream git@github.com:Apicurio/apicurio-studio.git
Once you have the source code checked out, you can build it using Maven:
mvn clean install
This should result in a full, clean build of the Apicurio Studio application. Once the build finishes, you could (for example) run the quickstart which would be located here:
$APICURIO_SRC/distro/quickstart/target/apicurio-studio-VERSION-quickstart.zip
Back-End API Development
The back-end API is a standard JAX-RS+CDI application running on Wildfly 10. The quickest way to set up a development environment is probably:
- Download and install the latest version of Eclise
- Install the JBoss Tools for Eclipse
- Import the apicurio-studio Maven project into Eclipse
- Download and install the Apicurio Studio quickstart
- Clean the quickstart’s standalone/deployments directory (remove all files)
- Add the quickstart to Eclipse in the Servers view as a WildFly 10 server
- Add the apicurio-studio-be-hub-api module to the server
- Start the server from the *Servers view
Once all of these steps are complete, you will have a running WildFly server integrated into Eclipse which you can run, debug, kill, etc. In particular, this will allow you to Debug the server very easily so that you can set and hit breakpoints in the code. The following sections of this document will describe each of the above steps in more detail.
Download and Install Eclipse
As of this writing, the latest version of Eclipse is 4.7, named Oxygen. Simply go to the Eclipse Downloads page and either download the Eclipse installer, or click Download Packages and choose the appropriate version of Eclipse. We recommend the Eclipse IDE for Java EE Developers when working on Apicurio Studio, but the Eclipse IDE for Java Developers is also fine.
If you downloaded the installer, simply run it and follow the prompts. If you’ve downloaded a package, installation typically consists of simply unzipping the file. After installation, launch the Eclipse IDE!
Install JBoss Tools for Eclipse
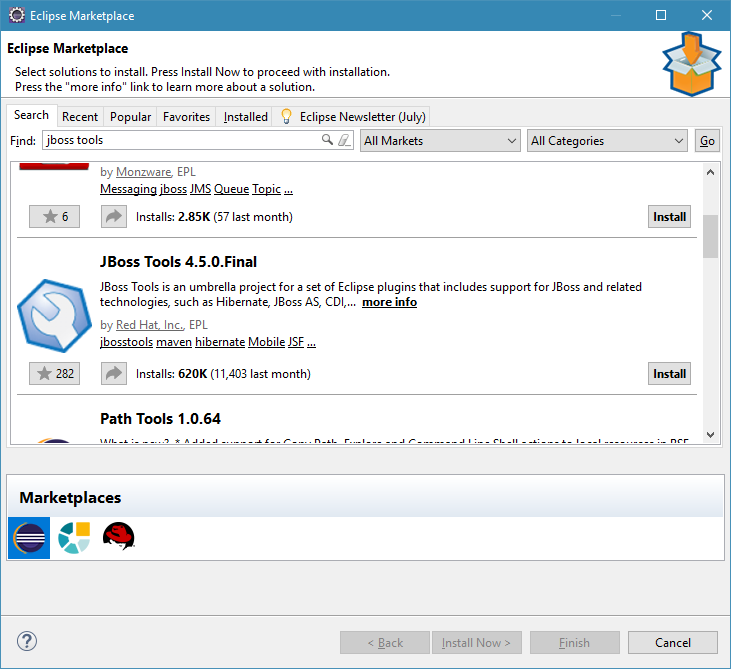
Once Eclipse is running, you’ll need to install the JBoss Tools for Eclipse to make it very easy to add a WildFly server to your Eclipse Servers view. Do this from the Eclipse Marketplace which can be found from the Help>Eclipse Marketplace menu. From the resulting Eclipse Marketplace dialog, search for jboss tools, then find JBoss Tools in the list and install it:
JBoss Tools Components
There are many components available in JBoss Tools. The only critical one is JBoss AS, WildFly & EAP Server Tools. All others are optional for Apicurio Studio development.
Import the Apicurio Studio Source into Eclipse
Now that everything needed in Eclipse is installed, go ahead and import the apicurio-studio source code (that you cloned in the steps at the top). To do this, go to File>Import from the main menu bar, then choose Maven>Existing Maven Projects from the resulting dialog.
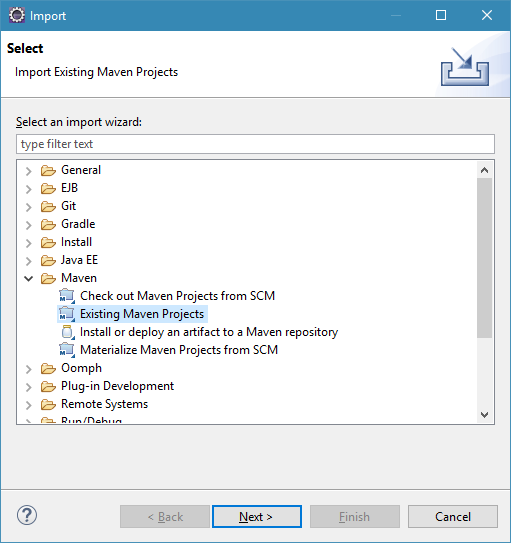
In the resulting Import Maven Projects dialog, simply browse to your cloned apicurio-studio source directory and import all of the projects found.
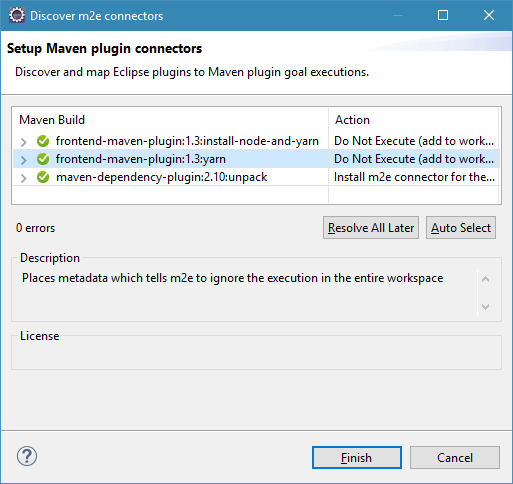
For any m2e connector errors, simply disable them (in the workspace). They are likely UI related maven tasks and are not required here.
Maven Errors
Often times after import, one or more Maven Error will be reported by Eclipse in the apicurio-studio-fe-app project. The quickest way to resolve this is to simply close that project, since it is the Angular based User Interface project and is not required for back-end development.
Download & Install the Apicurio Studio Quickstart
Next up we’ll need to download the quickstart so that we have a properly configured WildFly environment into which we can deploy our modified code. You can do this by going to the Apicurio Studio’s download page and grabbing the latest version. Unpack the downloaded zip file somewhere and then bring up Eclipse.
Clean the Deployment Directory
In the Quickstart installation directory, you need to delete all of the files in standalone/deployments so that it is ready to receive deployments from Eclipse when you make changes to the source code. Simply navigate to the quickstart installation location and delete the files in standalone/deployments (typically just a couple of WAR files).
Create a WildFly 10 Server in Eclipse
In Eclipse, open up the Servers view by choosing Window>Show View>Servers from the main menu. From that view, go ahead and create a new WildFly 10 server:
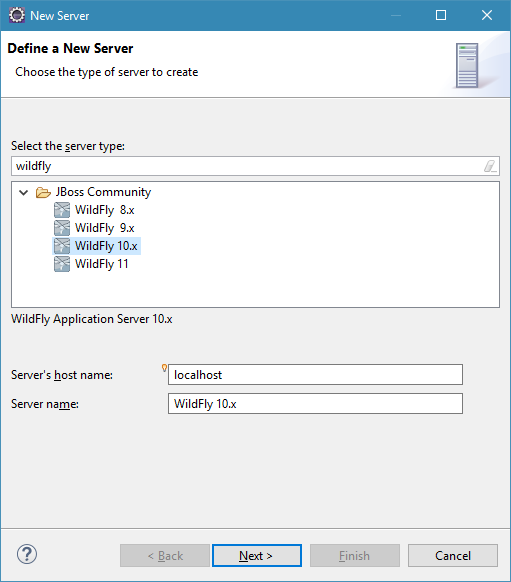
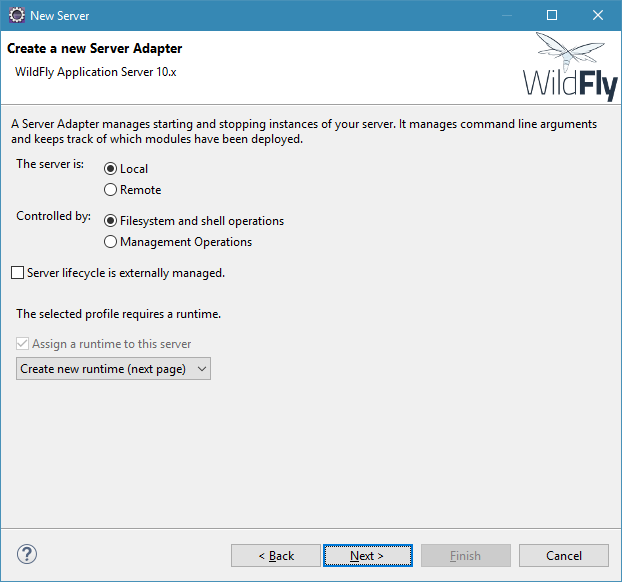
The first two pages of the New Server wizard are mostly default values. In the final page, however, you’ll need to set the Home Directory to the location of the downloaded Apicurio Studio Quickstart and also change the name of the Configuration file to standalone-apicurio.xml. Click Finish to complete the server creation.

Add the apicurio-studio-be-hub-* Server Modules
Now that the server has been created in Eclipse, you’ll need to configure it with the Apicurio Studio back-end API module. Do this by right-clicking on the server in the Servers view and selecting Add and Remove…. From the resulting dialog, move the following modules from the left Available section into the Configured on the right:
- apicurio-studio-be-hub-api
- apicurio-studio-be-hub-editing
Start the Server!
Now go ahead and start up the server by right-clicking on it in the Servers view and choosing either Run or Debug. You’ll probably want to typically choose Debug so that any breakpoints you set in the code will be hit.
You can check to see if the server is running properly by going to the following URL:
User Interface Development
The User Interface is built using Angular. When running in the quickstart or in production, it is packaged as a WAR and deployed to WildFly. However, when making changes it should be run using yarn/npm (ultimately via Angular CLI). The high level steps to setting up an environment for developing the UI are:
- Install a front-end IDE of your choice (we recommend WebStorm)
- Install node.js and yarn (prerequisites)
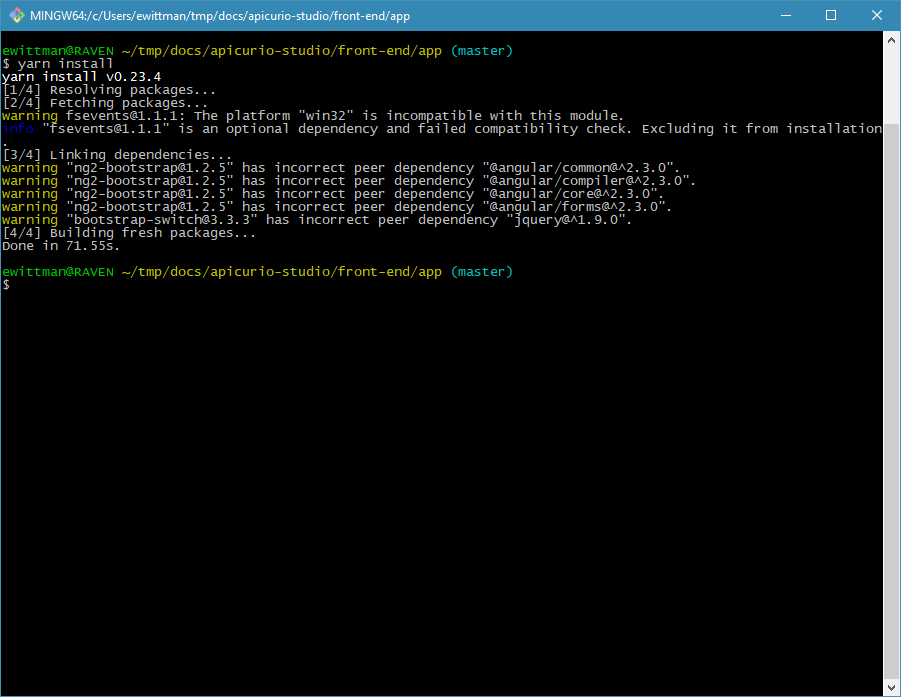
- Within APICURIO_STUDIO_SRC/front-end/studio run yarn install
- Download the keycloak.js file from the Apicurio Studio’s Keycloak server
- Create and configure a keycloak.json file
- Create and configure a config.js file
- Run the development server using yarn start
- Login here: http://localhost:8888/
Once all of these steps are complete, you will be able to make changes to the User Interface source files (*.ts, *.html, *.less) and the changes will be automatically detected by the development server. Simply refresh the browser and you can view the changes. The following sections of this document will describe each of the above steps in more detail.
Install Front-End IDE
After everything is configured and running, you will of course want to make changes to the source code and see them reflected in the browser. You can obviously use any tools you are comfortable with to make changes to the source. However, we have found that Webstorm (by Jetbrains) is a highly competent IDE for developing angular based applications and we recommend it (and use it) for Apicurio Studio development.
Install node.js and yarn
The two primary tools used for the UI development environment are node.js and yarn. You must download and install both these tools:
Run yarn install for Apicurio Studio
Yarn is the front-end package manager used by Apicurio Studio. To install all dependencies needed, you must navigate to APICURIO_STUDIO_SRC/front-end/studio and then run yarn install.
Download keycloak.js
The UI dev server must use the Keycloak Javascript Adapter to provide authentication using the same KC auth server that protects the back-end API. Since you’ll typically be running the UI dev server against the Apicurio Studio Quickstart, you’ll need to download the keycloak.js auth adapter file from:
Download that file and place it in the front-end/studio/src directory (alongside index.html).
Create & Configure keycloak.json
The Keycloak Javascript Adapter requires a configuration file so that it knows what remote server to use for authentication. Create a file called keycloak.json and place it alongside the keycloak.js file you created in the previous step. The content of this new file should be:
{
  "realm": "apicurio-local",
  "auth-server-url": "https://studio-auth.apicur.io/auth",
  "ssl-required": "none",
  "resource": "apicurio-studio",
  "public-client": true
}
Create & Configure config.js
The Apicurio Studio UI itself also needs a bit of configuration information, as it can be operated in a number of different modes. For this reason, you need to create a new file called config.js and place it alongside the keycloak.js and keycloak.json files created in previous steps. The content of this new file should be:
var ApicurioStudioConfig = {
    mode: "dev",
    auth: {
        type: "keycloakjs"
    },
    apis: {
        type: "hub",
        hubUrl: "http://localhost:8080/api-hub",
        editingUrl: "ws://localhost:8080/api-editing"
    }
};
Run the Dev Server
Now that all of the configuration files are in place, go ahead and start up the dev server by running yarn start.
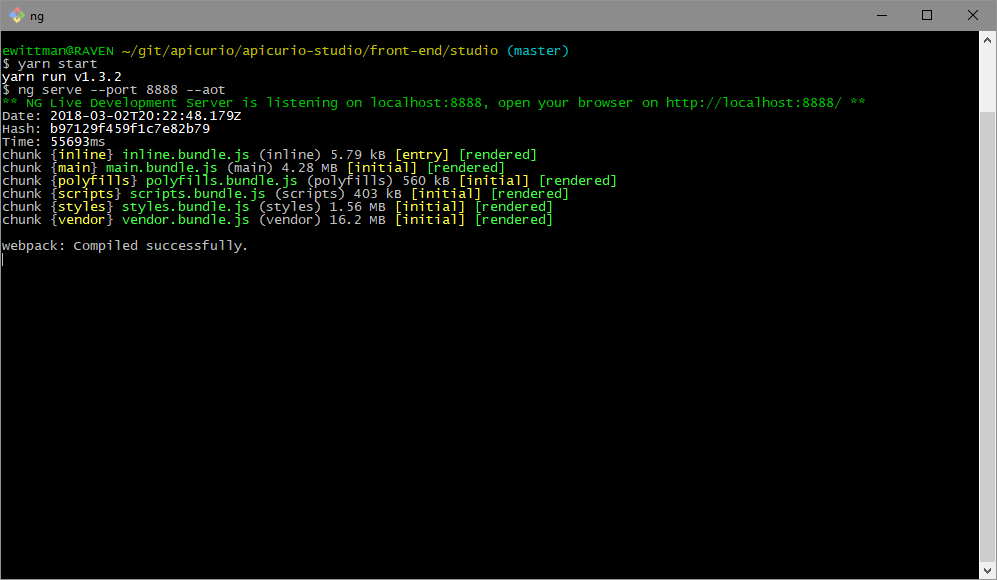
Angular CLI will start up, compile everything, and then open port 8888 for you to access the UI.
Login!
Once everything is up and running you can log into the Dev Server by going here:
Back End API Needed
Of course, for the Front End UI to function you will need to have a local instance of the Apicurio Studio Back End API running. You can simply download and run the Quickstart, or you can set up a Back-End API development environment and run that (see the steps above).