
Are you looking for a tool that will make your work with Apicurio Registry easier? If you have Visual Studio Code installed, there is an extension that allows you to interact with Apicurio Registry directly from your IDE. This project was contributed to the Apicurio community by Jean-Etienne Martin. 🎉
Installation
Installation is easy, because the extension is published to the Visual Studio Marketplace. In Visual Studio Code, go to the quick open dialog with ctrl+P, and execute the following command:
ext install apicurio.apicurio-registry-explorer
The extension will be installed within a few seconds. If you are using a non-official distribution of VS Code, such as VSCodium, the extension is also available on the Open VSX Marketplace.
Now we need to connect to an Apicurio Registry instance. We’ll use docker to start a quick ephemeral Apicurio Registry container at localhost:8080:
docker run -p 8080:8080 quay.io/apicurio/apicurio-registry-mem:latest-release
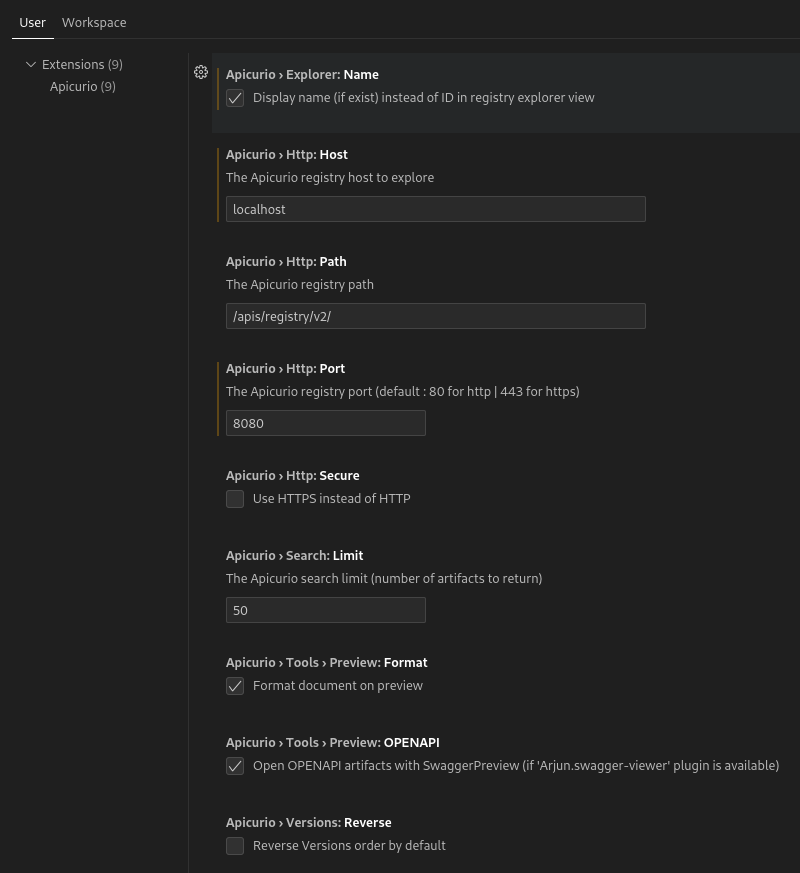
Open the settings panel (ctrl+,), go to Extensions > Apicurio, and fill in the connection details:
If you have configured the connection settings correctly, and started with an empty Apicurio Registry, the extension panel should look like this:
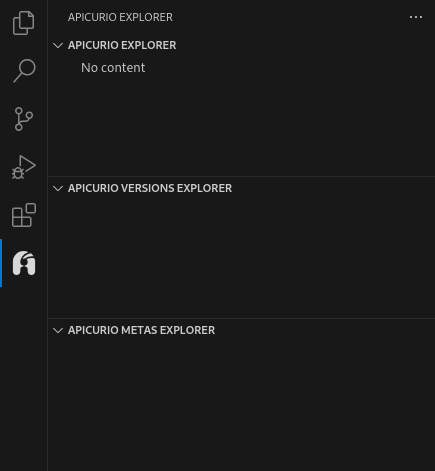
But don’t worry, it won’t stay empty for much longer!
Structure of content in Apicurio Registry
Before we use the extension to add new content to Apicurio Registry, let’s do a quick review of the organization of data in the Registry. This will help us better understand how to use the extension.
Main organizational unit in Apicurio Registry is called an artifact, which represents a piece content (e.g. an Avro schema) that can change over time. Each change to the artifact content results in a new version, so an artifact can be thought of as a sequence of versions. Version represents a specific piece of content that can’t be further modified, so the evolution of a schema happens at the artifact level. Artifacts are further organized into groups. Each artifact must belong to one specific group (the default group is unsurprisingly named default), and the groups can’t be nested.
As a result of this hierarchical organizational structure, each static piece of content can be identified by a group ID:artifact ID:version triple. There are other identifiers available, but the GAV can be considered a primary identifier.
In addition to the content itself, Apicurio Registry also stores metadata for an artifact and each artifact version. The metadata contain information such as when and by whom was the content created or modified, secondary identifiers, and user-editable data such as artifact name, description, or a map of properties. Some of the metadata (e.g. the properties), are shared between an artifact and its latest version.
One of the interesting pieces of artifact version metadata is its state, which can be one of ENABLED, DEPRECATED, or DISABLED. This value affects Apicurio Registry behavior when retrieving content. A disabled version behaves as if it were not present when a user attempts to retrieve it. Moreover, when reading artifact content (i.e. the latest version of an artifact), and the latest version is disabled, the previous version is returned instead. However, a disabled version still allows users to change its state, and will show in search results.
Adding new content to Apicurio Registry
Let’s add a few Avro schemas to the Registry, so we can find out how the extension displays Apicurio Registry content. You can use the following two example Avro schemas if you don’t have any others on hand:
The first version:
{
  "namespace": "example.avro",
  "type": "record",
  "name": "User",
  "fields": [
    { "name": "name", "type": "string" },
    { "name": "favorite_number", "type": ["int", "null"] },
    { "name": "favorite_color", "type": ["string", "null"] }
  ]
}
and a second version with updated content:
{
  "namespace": "example.avro",
  "type": "record",
  "name": "User",
  "fields": [
    { "name": "name", "type": "string" },
    { "name": "favorite_number", "type": ["int", "null"] },
    { "name": "favorite_color", "type": ["string", "null"] },
    { "name": "favorite_food", "type": ["string", "null"] }
  ]
}
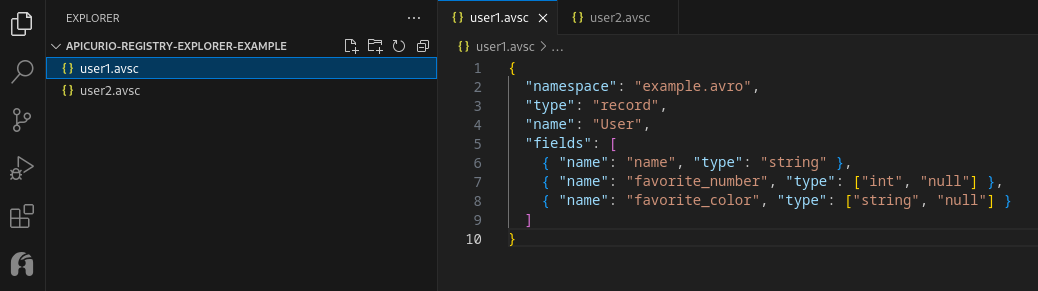
Click on File > Open Folder… to open a new empty working directory, and save the schemas above as new files user1.json and ser2.json, respectively.
To create a new artifact, click on the … > Add artifact in the Apicurio Explorer view. You will be shown a sequence of prompts, where you can choose from a list of options or input a text:
-
New or existing group ? asks you whether you want to create the artifact within an existing group, or do you want to create a new one. We’ll select NEW, since our Apicurio Registry is currently empty. If you select EXISTING, you will be asked to Choose group from a list of known group IDs.
-
Create a new group ID asks you to name the new group. We’ll use
default, and confirm by writingdefaultagain. -
Choose an artifact type to push asks you for the type of schema that is being published to Apicurio Registry, and lists the supported options. We’ll select
AVRO, and confirm.
-
Artifact ID asks you to specify the artifact ID. We’ll type
user, and confirm. -
Initial version prompt asks you to name the first artifact version. We’ll follow semantic versioning and use
1.0.0. -
Search for file prompt allows you to specify a search pattern, which will be used to provide a list of files from which you can select the schema. We named our schema files
user1.jsonanduser2.json, so we can inputuser*. If there are only a few files in your workspace, you can use*to save a few keystrokes🙂. -
Select file allows us to select one of the files based on the search pattern. Select the path where
user1.jsonfile is located on your computer. -
Create AVRO artifact with identifiers ‘default:user:1.0.0’ ? is the last step. It asks us for a confirmation that we want to create the artifact with the
default:user:1.0.0GAV identifier.
Exploring Apicurio Registry content
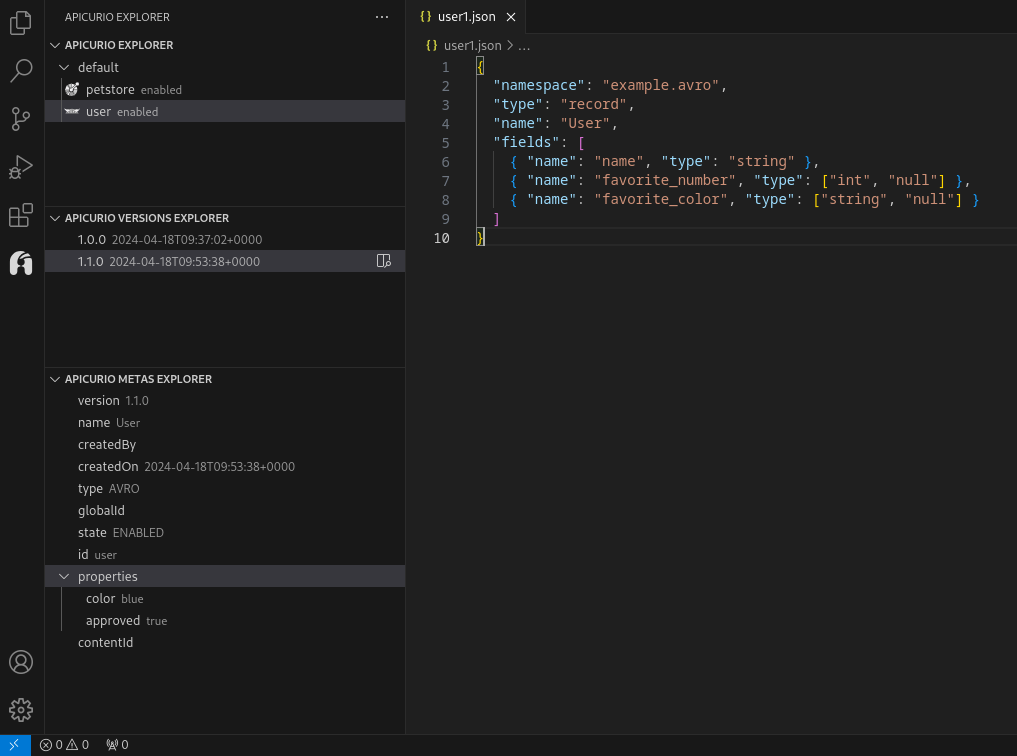
Let’s take a look at the three views that Apicurio Registry Explorer provides:
- Apicurio Explorer shows a list of artifacts, grouped by artifact group ID. Each item in the list contains artifact name, artifact state, and a tooltip with the artifact ID. This can be configured by the
apicurio.explorer.namecheckbox in the extension settings. Another thing to note is that the number of artifacts shown here is currently limited to50by default. This can be changed by theapicurio.search.limitsetting, but is definitely an opportunity for future improvement. In the top right menu of this view, users can:- Refresh the views
- Search for an artifact
- Add a new artifact
- Apicurio Versions Explorer shows a list of versions for a selected artifact. Each item in the list contains an artifact version, and its creation time. In the top right menu of this view, users can:
- Reverse the order of versions in the view
- Add a new artifact version
- Delete the entire artifact
- Apicurio Metas Explorer shows a list of metadata for a selected artifact or an artifact version. What metadata is shown depends on which item is selected in one of the above views. This view contains a simple key-value list of metadata, except in the case of properties, which is a map that can be expanded. In the top right menu of this view, users can:
- Change editable metadata
- Change artifact version state. This is presented as a separate operation in the UI.
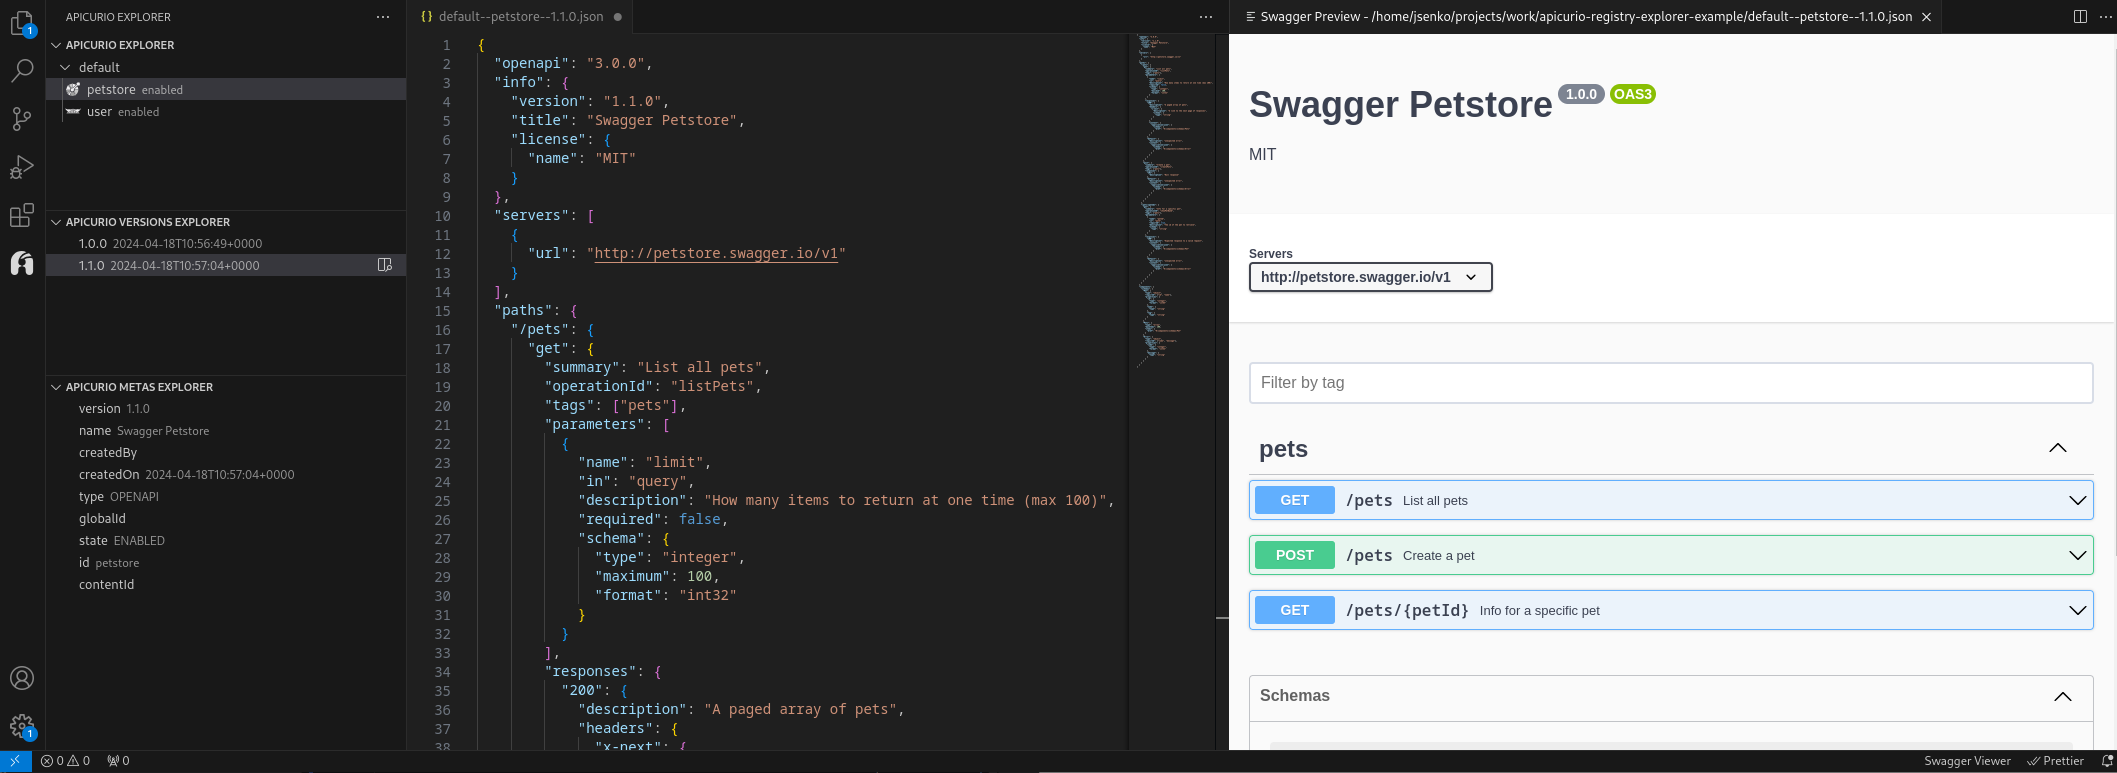
OpenAPI Content Preview
You can view the contents of an artifact version by hovering over an item in the Apicurio Versions Explorer, and clicking on the Open icon. This will download the version content and opens it as an unsaved file in a new editor tab. The extension will try to determine the path to your active workspace, and use it for the location of the unsaved file, but you can always click File > Save as… to change the file name and location.
Apicurio Registry Explorer extension supports integration with Swagger Viewer extension. This enables users to preview OpenAPI content stored in Apicurio Registry in the form of a generated documentation. To install Swagger Viewer, go to the quick open dialog with ctrl+P, and execute the following command:
ext install Arjun.swagger-viewer
then, when you open an OpenAPI file, Apicurio Registry Explorer will automatically launch a Swagger Preview tab for the given schema.
Upcoming Features
While there is a lot of useful functionality in the current version (1.0.3), the extension is still in early stages of development. Here is a list of several features that we would like to see implemented:
-
Authorized access support. Currently, the extension does not support authenticated access to Apicurio Registry. Integration with Keycloak (or any other OIDC provider) is an important feature that is missing at the moment.
- UX improvements. There are several improvements that will make the user experience with Apicurio Registry Explorer better, such as:
- Handle large number of artifacts and artifact versions in the view panels. Currently, there is a fixed, but configurable limit.
- Improve the workflow of some actions that require user input, for example, support corrections without starting the process of creating an artifact from the beginning.
- Auto-detection of schema type when creating a new artifact.
-
Integrated schema editor. As mentioned earlier, the extension supports a simple integration with Swagger Preview. However, it’s static and only works for OpenAPI. Apicurio community already has a project that is designed for editing of schemas, Apicurio Studio, which has recently started to receive more development focus. We should take advantage of this and integrate Apicurio Registry Explorer extension with Apicurio Studio editor.
- Integration with Apicurio Registry TypeScript client. This is more of an implementation detail. As you may know, there are several client libraries for interacting with Apicurio Registry. For Apicurio Registry version
3.0.0, we are working on a TypeScript SDK, which Apicurio Registry Explorer will be able to use.
Conclusion
Apicurio is a community of users and developers who are passionate about tools that help manage the API lifecycle. Apicurio Registry Explorer extension is an open-source project available on GitHub that a is a part of this effort.
We would be happy to hear about your experience with this extension, and any contributions, suggestions, and issue reports are always welcome. You can reach us on Zulip or on GiHub.
If you would like to contribute, please see the development documentation available on GitHub.