
Hey everyone, in recent Apicurio Registry versions we’ve introduced support for securing the application using different OpenID Connect (OIDC) servers, and not just Keycloak. In this blog post, I will explain how to configure the application to secure it using Microsoft Azure Entra ID.
Core Features
In this blog post, we will cover the following:
- Authentication based on Azure Entra ID - optionally protect Apicurio Registry so that the registry API and web console require users to authenticate (OAuth Authorization Code Flow supported)
Azure Entra ID Configuration
Authentication based on Azure AD
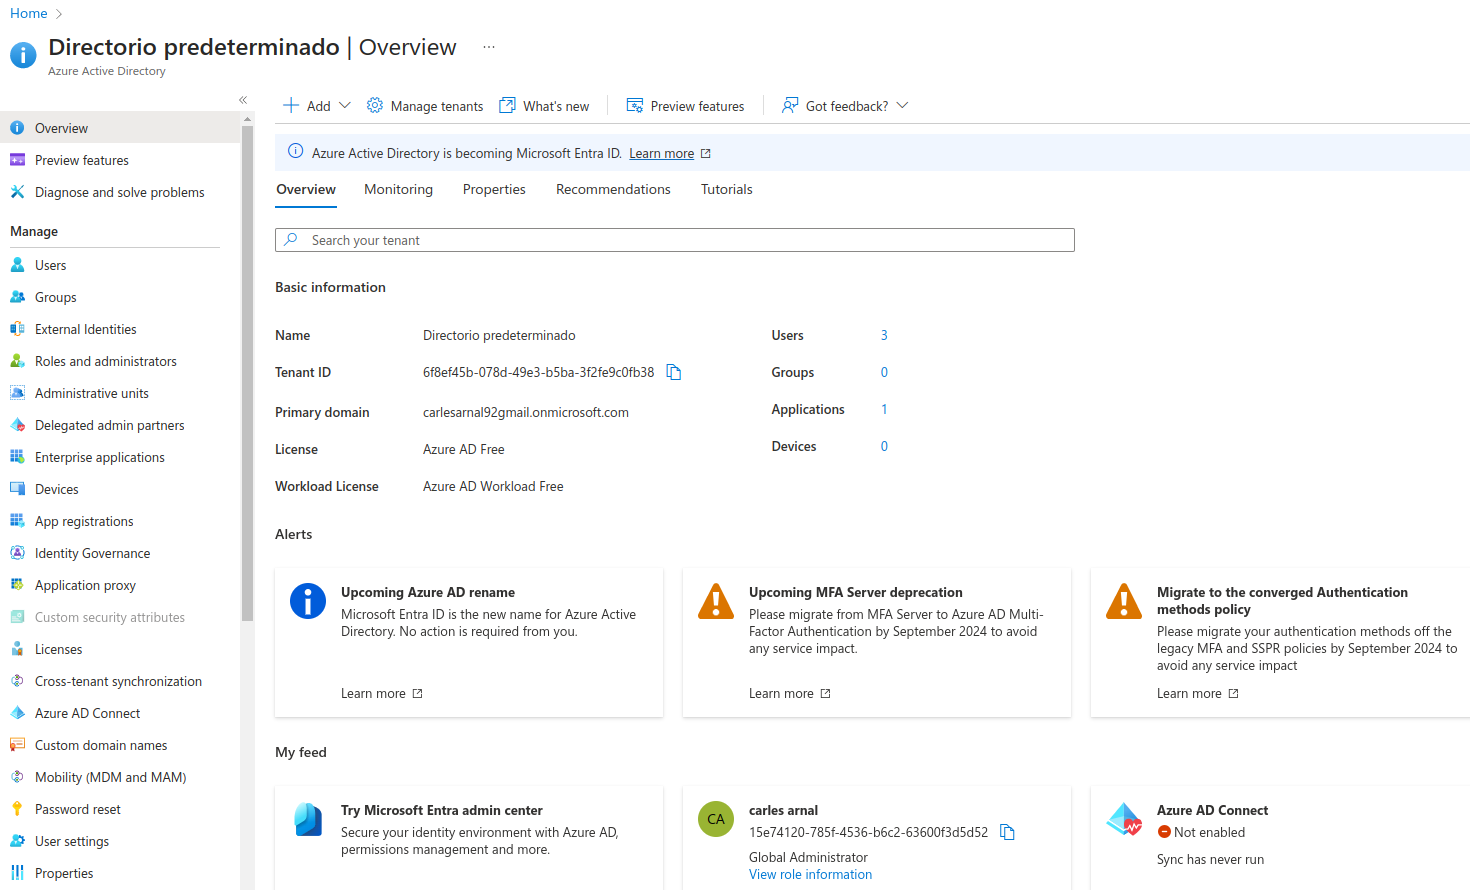
In order to secure Apicurio Registry you will need a valid directory in Azure and some specific configuration (described below). Essentially, you must register the Apicurio Registry application in the Azure portal. Log in to the Azure Portal. You can use your personal email address or your GitHub account to log in. After logging in, navigate to the Azure AD control panel by using the menu in the top-left corner. It should look like this:
Let’s dig into the Azure AD configuration for your Apicurio Registry deployment. Select Manage > App registrations in the menu on the left. Select New registration, and fill in the form. Enter apicurio-registry-example as the application name. We’ll also allow users from any organizational directory to log in.
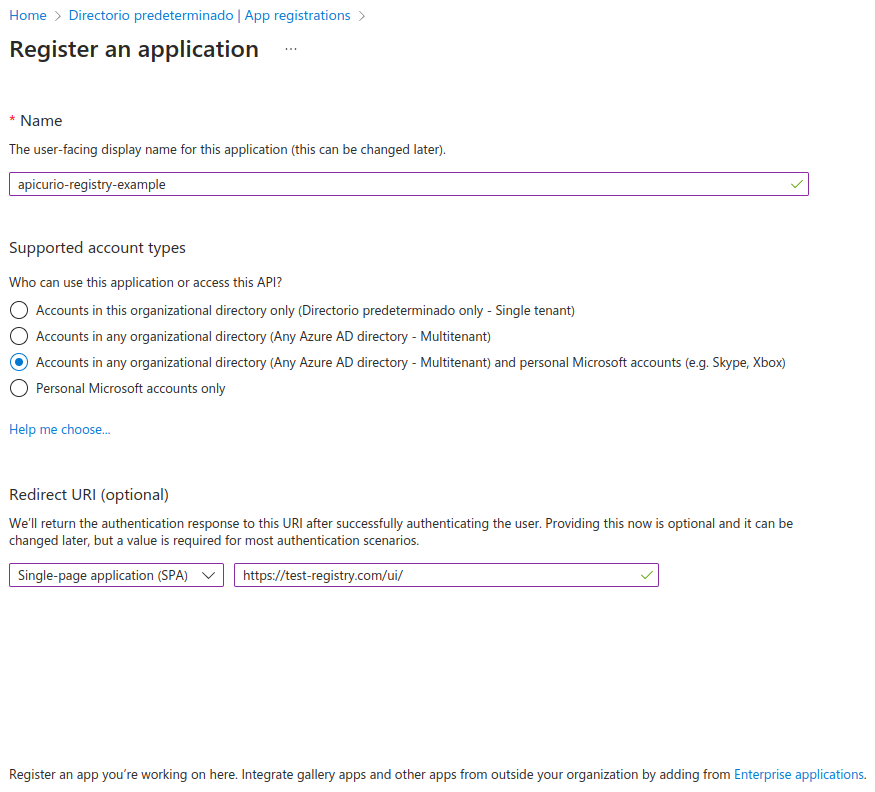
Important: Register the host of the server hosting your Apicurio Registry application as a redirect URI. As part of the logon process, users will be redirected from our application to Azure AD for authentication. We want to send them back to our application afterwards. Azure AD will not allow any redirect URLs that are not registered. We’ll come back to this later.
Click Register. You should now be able to find the app registration by selecting Manage > App registrations in the menu on the left.
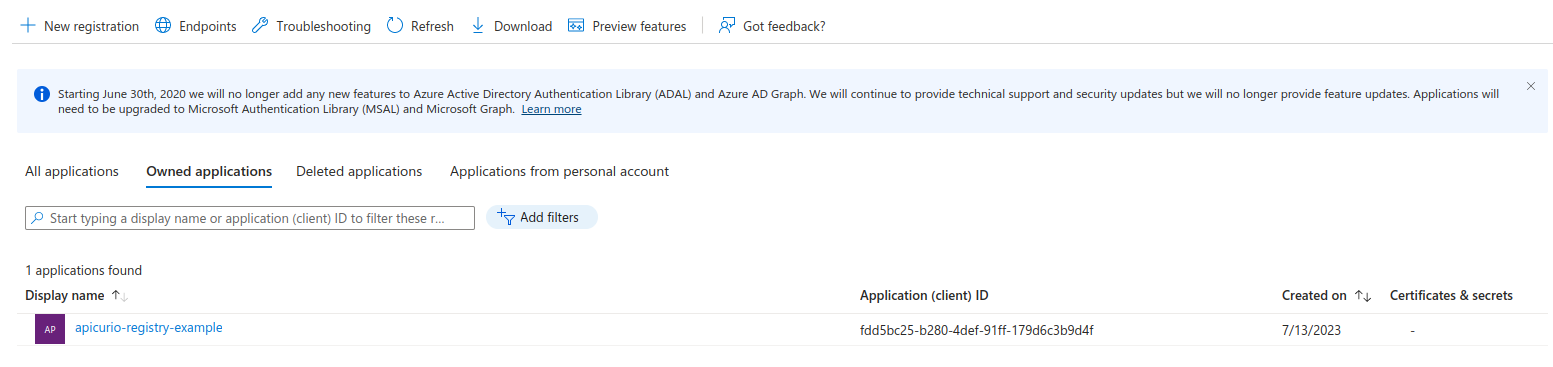
We can now find the parameters we need to set up Apicurio Registry with Azure AD OIDC. Click apicurio-registry-example to display its details:

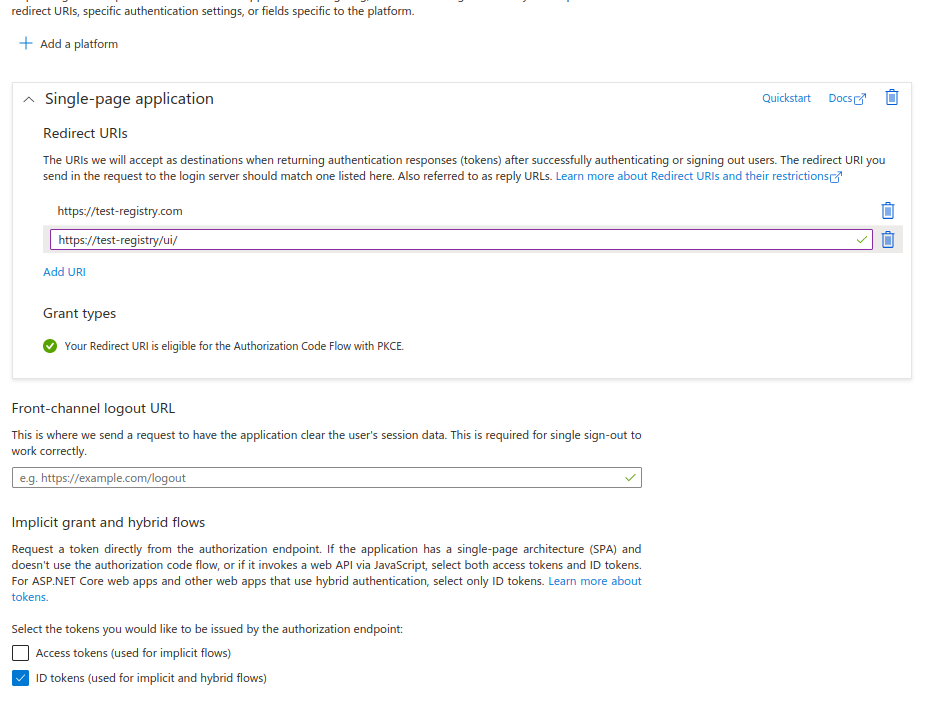
Select Manage > Authentication to configure the application with the redirect URLs and token as follows:
To configure Apicurio Registry with Azure AD, you must configure the following environment variables in Apicurio Registry using the Azure AD Application ID and the Azure AD Directory ID, along with some Apicurio Registry-specific configuration:
REGISTRY_AUTH_ENABLED=true
KEYCLOAK_API_CLIENT_ID=459569e9-c5f7-410a-a6e7-8db28d7e3647 #Azure AD > Admin > App registrations > Your app > Application (client) ID
REGISTRY_UI_AUTH_TYPE=oidc
REGISTRY_AUTH_URL_CONFIGURED=https://login.microsoftonline.com/6f9ef45b-456d-49e3-b5ba-1f6fe4c0fb78/v2.0 #Azure AD > Admin > App registrations > Your app > Directory (tenant) ID
REGISTRY_OIDC_UI_CLIENT_ID=459569e9-c5f7-410a-a6e7-8db28d7e3647 #Azure AD > Admin > App registrations > Your app > Application (client) ID
CORS_ALLOWED_ORIGINS=https://test-registry.com #The host for your Apicurio Registry deployment
REGISTRY_OIDC_UI_REDIRECT_URL=https://test-registry.com/ui/ #The host for your Apicurio Registry console
ROLE_BASED_AUTHZ_ENABLED=true
QUARKUS_OIDC_ROLES_ROLE_CLAIM_PATH=roles
Role based authorization
To enable roles, you must set the ROLE_BASED_AUTHZ_ENABLED property to true.
Of course, if you enable roles in Apicurio Registry, you must also create them in Azure AD.
You must create them as Application roles. The default roles expected by Apicurio Registry are sr-admin, sr-developer, and sr-readonly.
Another extremely important configuration is QUARKUS_OIDC_ROLES_ROLE_CLAIM_PATH=true because Azure AD stores the roles in a claim called roles.
Client credentials authentication
Apart from having users accessing the UI, it is quite frequent to have the requirement of doing machine to machine authentication, especially in the context of something like Apache Kafka. To do this, you can configure your setup to use the Client Credentials Grant using Entra ID. This can be achieved with the following steps:
- Create a new app registration that represents your client application. You can leave everything blank in the creation screen besides the name.
- In the Overview tab of your new application registration, create a new secret.
- Add a new API Permission to your client application, and, inside this option, add the role you want to use. This role should have been created in the last section as an Application role in the Registry server app registration. This is done so the role is sent within the token.
- In your client identifying the application and in the one identifying the Registry server, in the API permissions section, you must grant admin consent for your directory. Note that it may take a few seconds for this to take effect.
- Finally, configure your producer as follows, but note that the values here are just examples:
Properties props = new Properties();

// Configure kafka settings
props.putIfAbsent(ProducerConfig.BOOTSTRAP_SERVERS_CONFIG, SERVERS);
props.putIfAbsent(ProducerConfig.CLIENT_ID_CONFIG, "Producer-" + TOPIC_NAME);
props.putIfAbsent(ProducerConfig.ACKS_CONFIG, "all");
props.putIfAbsent(ProducerConfig.KEY_SERIALIZER_CLASS_CONFIG, StringSerializer.class.getName());
props.putIfAbsent(ProducerConfig.VALUE_SERIALIZER_CLASS_CONFIG, AvroKafkaSerializer.class.getName());
props.putIfAbsent(SerdeConfig.REGISTRY_URL, REGISTRY_URL);
props.putIfAbsent(SerdeConfig.AUTO_REGISTER_ARTIFACT, Boolean.TRUE);

//Security related properties
props.putIfAbsent(SerdeConfig.AUTH_CLIENT_SECRET, "CLIENT_SECRET"); //Here you must use the client secret of your client application created in step 2 above.
props.putIfAbsent(SerdeConfig.AUTH_CLIENT_ID, "c9715ca2-de14-4484-8b39-95f10050b099"); //This is the client ID of your client application.
props.putIfAbsent(SerdeConfig.AUTH_TOKEN_ENDPOINT, "https://login.microsoftonline.com/6f9ef45b-456d-49e3-b5ba-2f6fe4c0fb78/oauth2/v2.0/token"); //This is the token endpoint, the UUID is your tenant ID from Entra ID.
props.putIfAbsent(SchemaResolverConfig.AUTH_CLIENT_SCOPE, "api://frr5bc25-b280-4def-91ff-179d6c3b9d4f/.default"); //Finally, this is the expected value structure for the scope. The UUID is the application ID of the app registration that represents your Apicurio Registry server.

// Create the Kafka producer
Producer<Object, Object> producer = new KafkaProducer<>(props);
The result of the code snippet above is a Kafka producer that uses the AvroKafkaSerializer provided by the Apicurio Registry team, integrated with Entra ID.
Last, but not least, we still have a lot of things to do! As always, you can see the stuff we’re tracking by viewing the GitHub issues for the project.
If you find bugs or want to request a new feature, that’s a great place to start!