
Hey everyone, in Apicurio Registry 2.0.0. Finally we’ve introduced support for some new security features. In this blog post, I will explain these concepts and show you how to configure them.
Core features
Essentially in this blog post, we will cover the following:
- Authentication based on Keycloak - optionally protect the registry such that the registry API and web console require users to authenticate (BASIC and OAuth supported)
- Role-based authorization - when authentication is enabled, you can also enable this feature, and users must have at least one role of
sr-admin,sr-developer,sr-readonly - Creator-only authorization option - option to prevent changes to artifacts unless the authenticated user is the user who originally created the artifact
Keycloak configuration
Authentication based on Keycloak
To secure Apicurio Registry you will need a Keycloak server up and running along with some specific configuration.
Essentially, you must create a Keycloak realm, two clients, and some roles (if you want to use roles). By default, Apicurio Registry expects the name of the realm to be apicurio-local.
When security is enabled, Apicurio Registry will expect two Keycloak clients. By default, these clients should be named registry-api and apicurio-registry (but don’t worry, you will be able to customize everything by using environment variables!)
Below you have the required configuration for the clients.
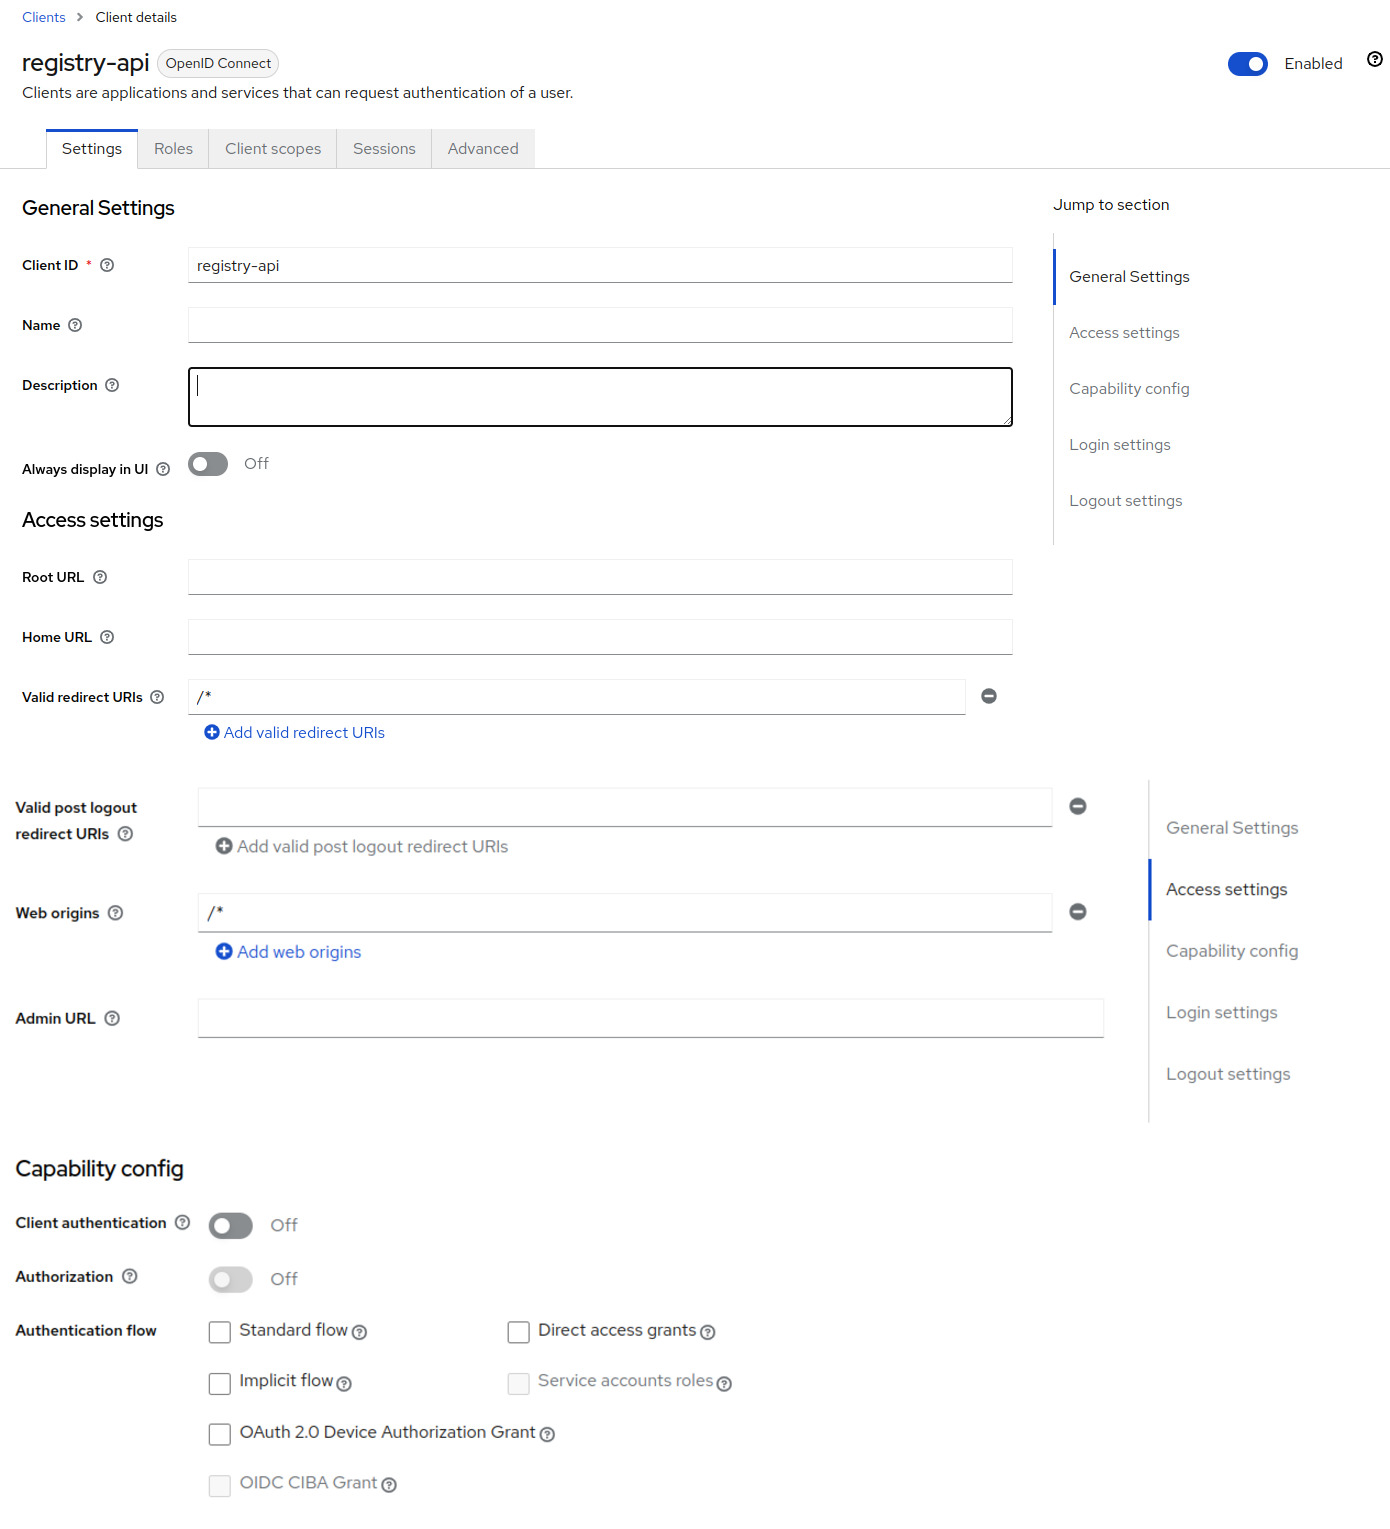
API client configuration
Web console client configuration
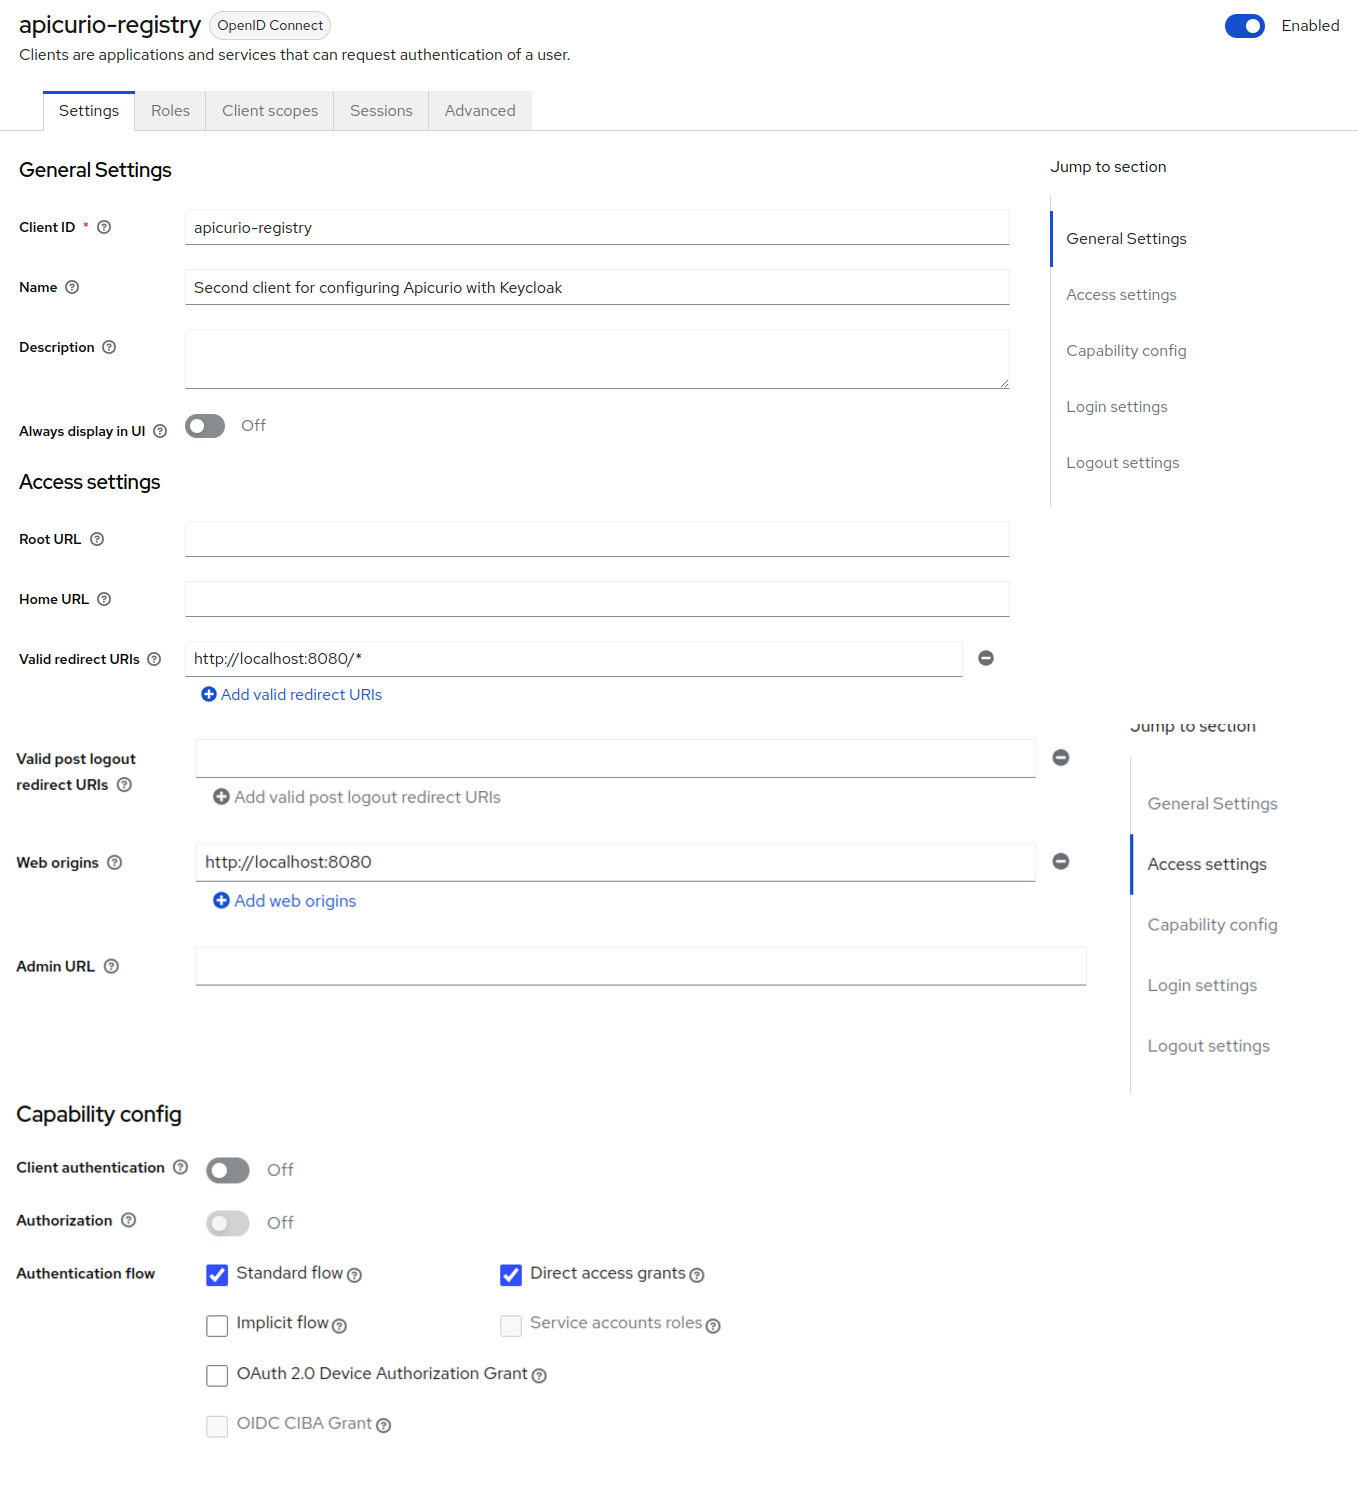
You will need to pay attention to the configuration - especially to the access types and the configuration URLs.
For the registry-api client, make sure to configure it as bearer-only, in the latest keycloak releases you will have to uncheck all the Authentication flows in the capability config. For the apicurio-registry client, you will need to configure it as public, to allow users to connect to your UI.
You will also need to configure Web Origins, you can use + to allow Web Origins coming from the redirect URL.
Now, you will need to tweak the Apicurio Registry configuration to get this to work.
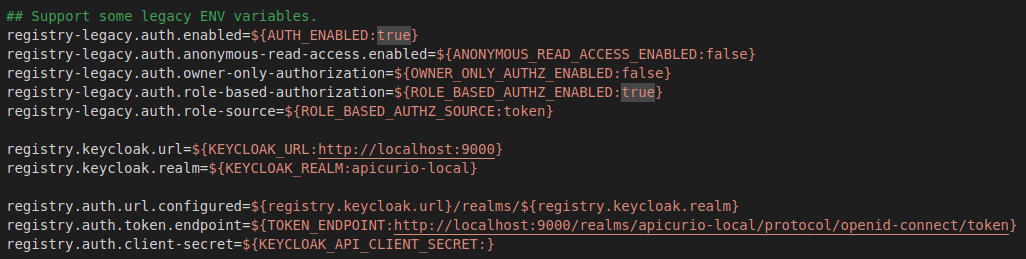
The first property that you must set is AUTH_ENABLED. You will need to set it to true to enable the integration. The second property you need to set is the Keycloak server URL: KEYCLOAK_URL.
We provide some sensible defaults for most of the configuration, but please, note that you can customize most of them by using environment variables.
Role-based authorization
To enable roles, you need to set the ROLE_BASED_AUTHZ_ENABLED property to true.
Of course, if you enable roles in Apicurio Registry, you must also create them in Keycloak as realm roles. The default roles expected by Apicurio Registry are sr-admin, sr-developer, and sr-readonly.
When you enable roles, this will result in some HTTP paths and operations available just for certain roles.
You have the full configuration in the image above, but there are some operations like those around rules, logs levels, and so on that are restricted to the admin role.
The developer role can perform most of the operations, and the read-only role can read or search artifacts.
Creator-only authorization option
Finally, you also have the option to restrict certain operations just to the creator of the artifact. To do so, you can set the environment variable OWNER_ONLY_AUTHZ_ENABLED to true.
Last, but not least, we still have a lot of things to do! As always, you can see the stuff we’re tracking by viewing the GitHub issues for the project.
If you find bugs or want to request a new feature, that’s a great place to start!